
 Matze Weiss (2021) [Photograph] Unsplash
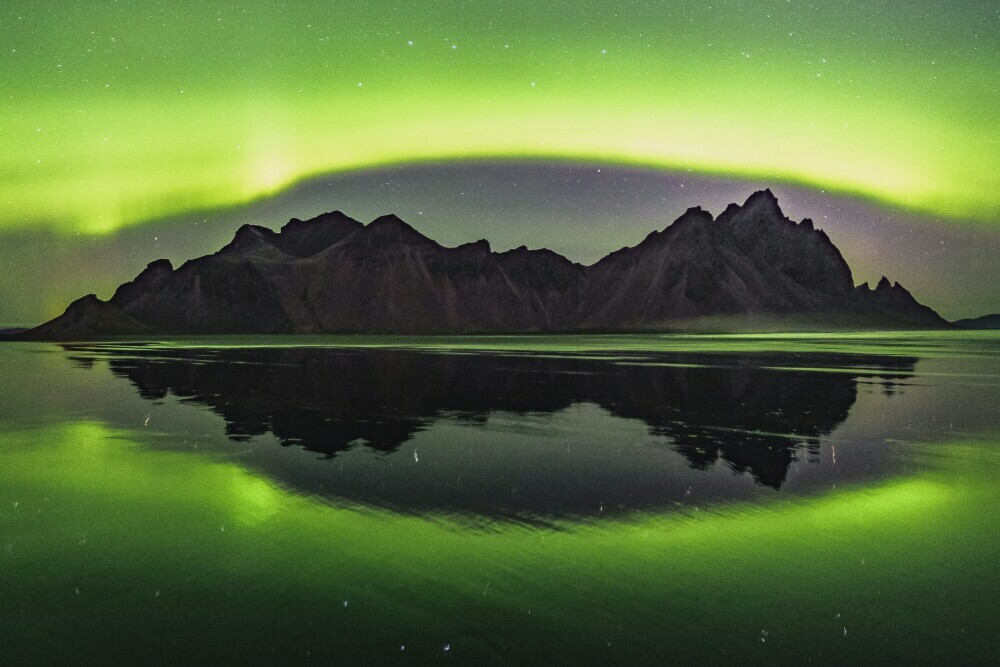
If you’re eager to photograph the Northern Lights, a spectacle that fills the night sky with vibrant colors, starting with a solid plan is crucial. Like any excellent photo opportunity, success often lies in the preparation. Here’s what you need to know before starting your Aurora Borealis adventure.
Firstly, UNDERSTAND what you’re trying to capture. The Northern Lights, or Aurora Borealis, are a natural light display best seen in the polar regions. The spectacle results from charged particles from the sun interacting with the Earth’s magnetic field. Learning about these phenomena can provide insights into predicting when they might occur, which is vital for planning your shoot.
Timing is everything when it comes to Northern Lights photography. While they can appear any time of year, your best bet is during the equinoxes, when geomagnetic activity is higher. As for the day of the week, it doesn’t matter—the Lights don’t adhere to our calendars. However, you’ll want to check Aurora’s forecasts and aim for a night with clear skies and minimal moonlight to reduce light pollution.
Finding the RIGHT LOCATION is a game-changer. Look for places with apparent northern horizons and as little artificial light as possible. Sometimes, this might mean venturing into colder, remote areas. A little discomfort can lead to spectacular results, so dress warmly and prepare for the chill.
Lastly, familiarize yourself with night sky photography fundamentals since the Aurora is dynamic and challenging. Do some practice runs capturing night landscapes to get comfortable operating your camera in the dark and test different settings.
The Photographer’s Toolkit: Essential Gear for Aurora Borealis
 Brent Ross (2021) [Photograph] Unsplash
When you’re gearing up to capture the ethereal beauty of the Northern Lights, the quality and type of equipment you have can make a significant difference. Here’s a rundown of the essential gear to ensure you’re well-prepared.
Your camera is your most critical tool. A DSLR or mirrorless camera with manual mode capability is necessary, allowing you to adjust exposure settings freely. Look for models with high ISO performance to capture the Aurora efficiently in low-light conditions.
Next up, let’s talk lenses. A wide-angle lens with a large maximum aperture, preferably f/2.8 or more expensive, is ideal for letting in sufficient light and capturing expansive landscape shots. Lenses that offer sharpness across the frame will render the lights stunning.
A sturdy tripod is non-negligible. The Northern Lights photography is all about stability for long exposures. Your tripod should withstand the elements while keeping your camera motionless to avoid any blur in your images.
Remember that temperatures can drop significantly when shooting at night in the high latitudes. So, extra batteries are a must as cold weather tends to drain battery life faster. Keeping batteries warm, such as by storing them close to your body, can help preserve their charge.
Lastly, while not essential, a remote shutter release can be a valuable addition to your toolkit. It allows you to trigger your camera’s shutter without physical contact, avoiding camera shake and ensuring sharp photos during critical long-exposure captures.
Now that you have your gear checklist, you might wonder how to use it best. In the next section, I’ll guide you through that, focusing on mastering camera settings and techniques to transform the incredible light show into stunning imagery.
Mastering the Night: Camera Settings and Techniques
 Hendrik Morkel (2022) Storslett, Norway [Photograph] Unsplash
Capturing the Northern Lights is more than just having the right gear; it’s about mastering the camera settings that will turn a moment into a masterpiece. The settings you choose will vary depending on your camera and the intensity of the lights, but there are general guidelines you can follow.
ISO is your sensitivity to light. Start at a base of 1600 and adjust based on the strength of the Aurora. Shutter speed is crucial; if it is too long, the lights will blur, and if it is too short, they won’t register. Begin at 15 seconds and tweak as necessary. Aperture affects the light intake; a wide aperture, such as f/2.8, is preferred.
Long exposures let you capture the lights’ flow across the sky. Keep the camera still to prevent shaking – a tripod is non-negotiable here. A suitable composition can add depth to your shots. Use natural landmarks or silhouettes to frame the spectacle and add context.
Adjusting settings in real time is a common hurdle. The lights can flare and fade quickly, so monitor the display and make swift decisions. If brightness increases, lower the ISO or shorten the shutter speed to avoid overexposure.
Improving these techniques takes practice. Try experimenting with settings in your backyard on clear nights to get comfortable with the adjustments. As you grow confident in these settings, you’ll unlock the potential to create truly striking images of the Northern Lights that resonate with the raw emotion of the moment.
Embracing the Night Sky: Final Words
 Hendrik Morkel (2022) Hetta – Pallas Trail, Finland [Photograph] Unsplash
I hope these techniques and insights equip you with the confidence to venture out and capture the Northern Lights. Remember, patience and persistence are your best allies in this pursuit.
If you’ve adhered to the camera settings and applied the recommended techniques, you’re on your way to creating spellbinding images. But don’t stop here. Like any skill, Northern Lights photography gets better with practice and experimentation.
I urge you to reflect on your experiences after each session. Revisit your settings, scrutinize your compositions, and don’t hesitate to refine your approach. Photography, after all, is a constant learning process that rewards the curious and the diligent.
Involve yourself in communities of fellow night sky enthusiasts. Sharing your captures can provide valuable feedback and inspire others while viewing the work of your peers can offer fresh perspectives and techniques to consider.
Take pride in the images you’ve created; they are your unique interpretation of one of Earth’s most awe-inspiring natural phenomena. And remember to take a moment away from the lens to absorb the celestial show with your own eyes – it’s a memory that will stay with you forever.
When you’re ready to share your captures of the Aurora Borealis, tag them with Beginner Northern Lights photography so we can all admire your work. Keep shooting, and let the sky be your canvas!
Disclaimer: The Aurora Borealis is a natural phenomenon, and sightings cannot be guaranteed.
This article directly provides general research and book tours with reputable operators for the most up-to-date information and the best possible experience.
For additional blog posts, please visit:
https://northernlightsshuttertech.com/
(This post may contain affiliate links. If you make a purchase, I may receive a small commission at no cost. Thank you!)