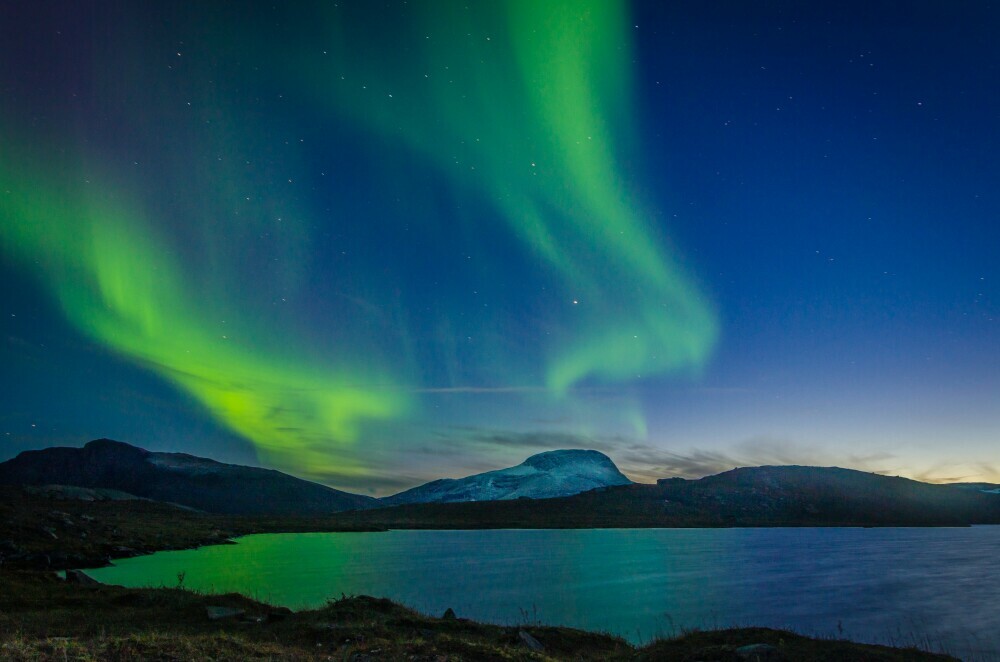
 David Becker (2018) Abisko National Park, Sweden [Photograph] Unsplash
The Northern Lights, or Aurora Borealis, present one of nature’s most spectacular light shows. Vibrant hues dance across the night sky, creating scenes that beckon photographers worldwide. For me, catching the perfect snapshot of this phenomenon isn’t just about having the right equipment; it’s a careful blend of timing, location, and the ability to use natural elements to your advantage.
Enhancing images of the Northern Lights requires more than just pointing a camera towards the sky. Understanding how natural elements can frame and elevate each photograph’s visual storytelling is essential. Trees, mountains, and water bodies aren’t just landscape components; they are characters that add depth and drama to the celestial display.
Interest in capturing the Aurora Borealis through photography has surged recently, and with good reason. The captivating dance of colors amidst the stars offers a unique challenge to photographers. It’s not just about snapping a photo; it’s about crafting a memory, a moment frozen in time that encapsulates the raw beauty of the natural world.
I aim to ensure that ‘Northern Lights Photography‘ isn’t just a buzzword but a testament to the high-quality images you can capture. A clear, crisp photo that captures the essence of this phenomenon is straight out of a dream. Let’s prepare to make those dreamlike images a vivid reality.
Mastering the Elements: The Bedrock of Spectacular Photos
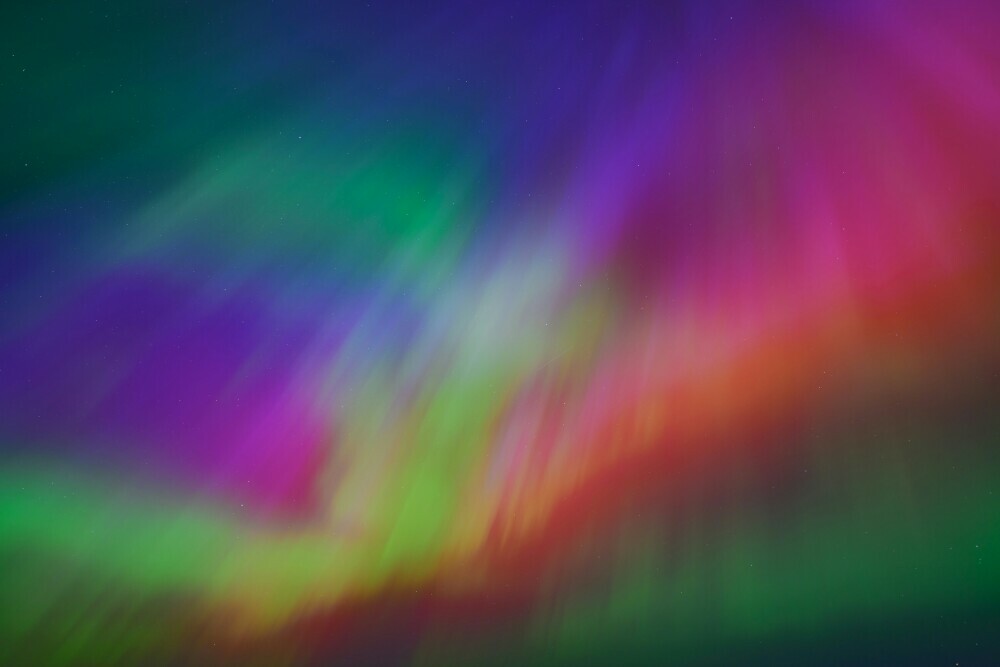 Kristaps Ungurs (2024) Latvia [Photograph] Unsplash
Understanding and using the natural elements to your advantage is crucial to capturing the Northern Lights in a way that does them justice. It’s about more than just pointing your camera at the sky and hoping for the best.
The interplay of light and landscape during nighttime can turn a good photo into a spectacular one. Light pollution should be minimized to allow the colors of the aurora to shine through. Meanwhile, the landscape can provide a stunning backdrop that adds depth and context to the celestial show.
Different natural elements can either enhance or detract from your Northern Lights photographs. For instance, incorporating bodies of water can lead to reflections that double the visual impact of the lights. At the same time, clouds can add a dramatic effect or obscure your view entirely.
Your geographic location plays a vital role in night sky photography. Factors such as magnetic latitude, distance from the auroral oval, and local topography will influence your chances of capturing the lights at their best.
In terms of weather, clarity is king. A clear, dark sky is an ideal canvas for the aurora’s palette. Before planning your shoot, it’s advisable to monitor space weather forecasts, as solar activity directly affects the intensity and frequency of the auroras.
Anticipating optimal weather conditions can make a world of difference. This can mean canceling plans at the last minute or waiting patiently for hours in the cold, but when the lights begin their dance across the sky, the results can be nothing short of magical.
Advanced Aurora Photography Tips and Techniques
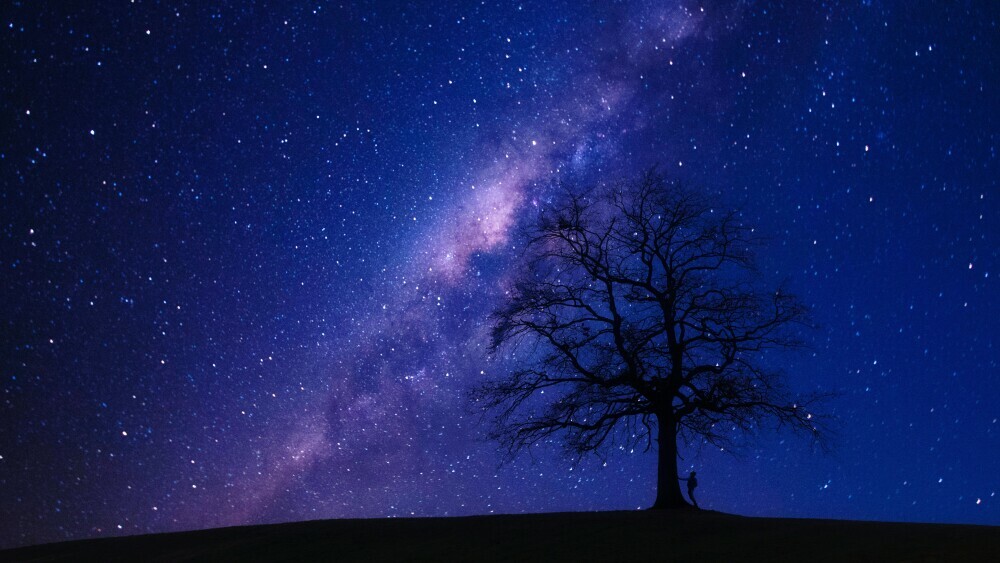
 Kristaps Ungurs (2023) Latvia [Photograph] Unsplash
As a seasoned photographer, I recognize that securing the perfect Northern Lights photograph isn’t simply a matter of luck; it requires meticulous preparation, patience, and a deep understanding of photography techniques. In this section, I will share insights beyond basic night sky photography, aiming to elevate your skills in capturing the elusive dance of the Aurora Borealis.
First, let’s discuss equipment. A DSLR or mirrorless camera with manual mode capabilities is imperative. High ISO performance is vital, as is the ability to manually focus your lens, which can be challenging in low-light conditions. A wide-angle lens with a wide aperture, like f/2.8 or more, will allow light to enter, which is vital for these conditions.
Tripod stability is also a deciding factor. The Northern lights require long exposure photography, and even minor vibrations can blur the crispness of the stars and aurora. A sturdy tripod becomes your steadfast ally in the pursuit of clarity. A remote shutter release or the camera’s timer is essential to eliminate the camera’s further shake.
While gear is paramount, timing is equally crucial. The aurora’s peak visibility often occurs during late autumn to early spring. Aligning your shoot with the new moon phase maximizes darkness and enhances the aurora’s visibility. Ambiance is everything, so seek out locations far from city lights to ensure the night sky’s majesty remains unspoiled by artificial light pollution.
Compositionally, think about what foreground elements can anchor the sweeping lights of the aurora. Incorporating reflective lakes, intriguing land formations, or silhouetted trees can add a profound depth to your images. These features provide a sense of place and scale, which is essential when dealing with the grandeur of the night sky.
Perhaps one of the most overlooked aspects is patience. Auroras are unpredictable, so be prepared to wait. Dress warmly and be ready for the show to start any moment – the most spectacular formations can emerge and fade within minutes. With patience and readiness, you’ll be set to capture the Northern Lights’ most dramatic moments.
Post-Processing: From Great Shots to Masterpieces
 Johannes Plenio (2019) [Photograph] Unsplash
After returning from the cold, silent nights where the Northern Lights dance, it’s time to bring your captured moments to life, in this final stage, attention to detail can transform your photos from simple snapshots to genuine works of art.
Post-processing is a delicate balancing act. With tools like Adobe Lightroom or Photoshop, subtle color, contrast, and luminance adjustments can bring out each image’s full potential. For Northern Lights photography, specific attention will be given to enhancing the vibrant colors of the aurora against the night sky.
Here’s a word to the wise: less is often more. The temptation might be to push slides to the extreme, but restraint ensures that the natural majesty of the aurora remains the star. This means prioritizing faithfulness to the scene as it appeared to your eyes, adjusting only enough to overcome the limitations of camera sensors.
Yet, some photos may benefit from more advanced techniques. Enhancing images through exposure blending for dynamic range or focus stacking for sharpness throughout can add depth and vivid character to your pictures. Nevertheless, these must be applied thoughtfully to preserve the scene’s authenticity.
Be mindful that the accurate measure of success in photography isn’t solely found in the perfection of technique but also in the story and emotion your images convey. So, while post-processing can nudge a Northern Lights photograph from the realm of the ordinary into the extraordinary, always remember to keep the spirit of the night – unfiltered and raw – as your guiding star.
To summarize, enhancing your Northern Lights photography through post-processing is essential to achieving spectacular photos. Utilize this stage to refine the natural beauty you’ve witnessed, not redefine it. With these final touches, your journey from frozen nightscapes to awe-inspiring aurora displays is complete.
(This post may contain affiliate links. If you make a purchase, I may receive a small commission at no cost to you. Thank you!)