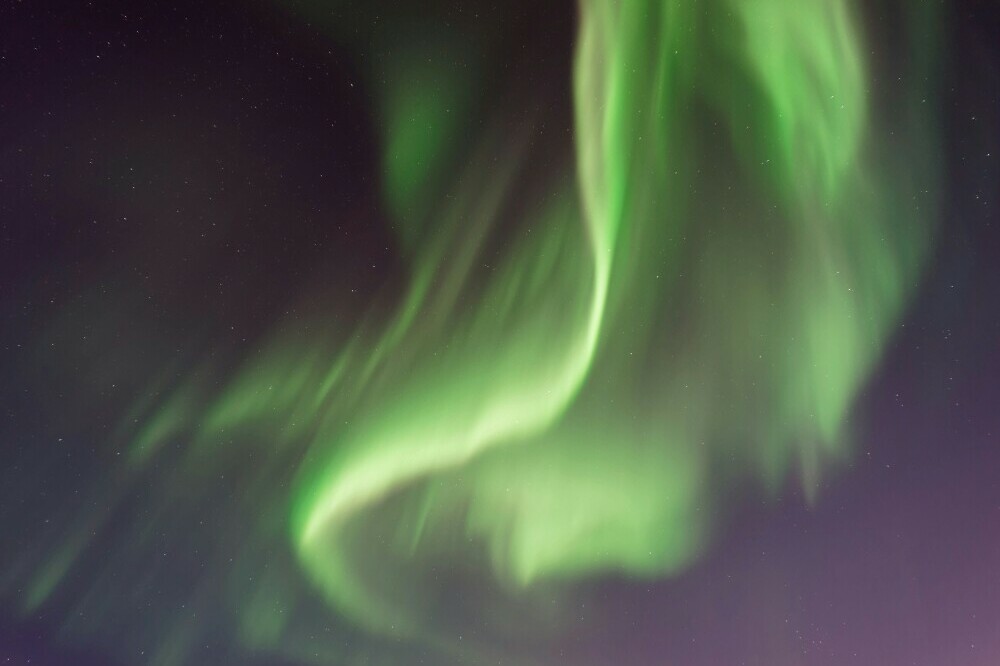
 Simon Sun. (2018) the Northern Lights [Photograph]. Unsplash.
If you aim to create a mesmerizing time-lapse video of the Northern Lights, the right gear is your ticket to success. There’s something unique about time-lapse photography’s ability to compress time and motion into a stunning visual narrative. Especially in the Aurora Borealis, the dance of colors across the sky begs to be captured with the proper technique and equipment.
Your camera is the cornerstone of the time-lapse setup. A DSLR or mirrorless camera that allows for manual control over shutter speed, aperture, and ISO is essential. Securing a wide-angle lens with a wide maximum aperture, such as f/2.8 or more expensive, will gather more light—a crucial factor in the dimly lit environments where the Northern Lights thrive.
Don’t skimp on the tripod. It must be robust enough to stand firmly against harsh arctic winds. A reliable intervalometer, which automates photo capture at preset intervals, is necessary for a genuinely hands-off time-lapse experience. For those diving into extreme cold conditions, consider lens heaters to combat lens fogging and battery frostbite to keep your gear performing at its best.
While the camera setup is critical, so are the accessories you bring along. Extra batteries, memory cards, and protective gear for yourself and your equipment can differentiate between a booming shot and a trip riddled with setbacks. After all, preparation is a precursor to perfection in time-lapse photography.
Planning Your Time-lapse Shoot: When and Where to Capture the Aurora Borealis
 Federico Bottos. (2018) the Northern Lights Norway [Photograph]. Unsplash.
Finding the right spot to set up your camera for a Northern Lights time lapse is crucial. First, I’ll walk you through choosing a location with minimal light pollution and a clear sky view. This could mean a trek out into the wilderness or finding a secluded spot away from city lights.
Next, timing is equally essential. The period between September and April typically offers the best chances to capture the Aurora Borealis. Though it’s possible on dark, clear nights, the ideal time is often around midnight. Yet, it’s vital to remain flexible as solar activity can be unpredictable.
Weather is another critical player in the hunt for the Northern Lights. Overcast skies are the nemesis of time-lapse photography. I recommend using specific apps to monitor the weather and geomagnetic activity, ensuring you’re set up during optimal conditions.
Lastly, think about the composition. A stunning time-lapse isn’t just about the lights and the landscape they dance over. Incorporating the silhouettes of mountains or reflections in a serene lake can transform a good Aurora time lapse into a GREAT one.
Fine-Tuning Your Craft: Time-lapse Techniques for Cinematic Aurora Borealis Videos
 Vincent Guth. (2016) the Northern Lights Iceland [Photograph]. Unsplash.
Imagine standing under a clear, dark sky, your camera trained in the heavens as the Northern Lights perform their silent, spectacular ballet. You’re creating not just a video but an entire experience. I’ll share practical steps to capture this magic.
First, a shooting script and a storyboard are your blueprints. They guide what you’ll shoot and how the Aurora story unfolds over time. Think about composition, movement, and the changes in intensity you want to capture.
Next, camera settings are crucial for clarity. Manual mode is your friend here, as it gives you complete control over exposure. Base ISO should be as low as possible to reduce noise, and the aperture should be wide open to allow maximum light. Longer exposures catch fuller movements, but take care with the balance—too long, and you’ll lose detail.
What about those smooth transitions? For Northern Lights time-lapse, the interval between shots can make or break your sequence. Small intervals capture fluid motion, but storage fills quickly. Typically, a 2 to 10-second gap works well.
Now consider motion in your footage. Adding a slider or experimenting with pan and tilt moves can create a more engaging and immersive video. However, each movement must be slow and measured to align with the deliberate pace of the night sky.
In all these steps, patience is your silent partner. Time-lapse is a waiting game, and your dedication will be rewarded with footage that brings viewers into the heart of the aurora’s mystery.
Bringing Your Vision to Life: Video Editing Tips for Stunning Northern Lights Time-Lapse Results
 Tommy Tang. (2016) The Northern Lights Fairbanks [Photograph]. Unsplash.
Once you’ve captured the raw grandeur of the Aurora Borealis through your lens, the next phase is to sculpt those moments into a cohesive visual story. I recommend using reputable video editing software to handle the high-resolution files your time-lapse photography yields.
Begin by importing the succession of images into your chosen editing platform. Stitching the frames together at the right speed is essential to simulate smooth motion. Do not rush this process; your goal is to do justice to the natural rhythm of the Northern Lights.
Many enthusiasts overlook the color grading stage—it’s crucial for time-lapse videos, particularly natural phenomena like the Aurora. Your objective should be to enhance the colors realistically without oversaturating them. It might take some trial and error, but that breathtaking result is worth the effort.
Finally, after meticulously tweaking and reviewing your time-lapse, export your video. Choose the appropriate format and compression settings to retain the quality. Remember, sharing your work on social platforms can garner viewers’ appreciation and open doors for future projects.
(This post may contain affiliate links. If you make a purchase, I may receive a small commission at no cost to you. Thank you!)
For additional blog posts, please visit:
Northern Lights Shutter Tech – Capture the Magic Gear & Expertise