
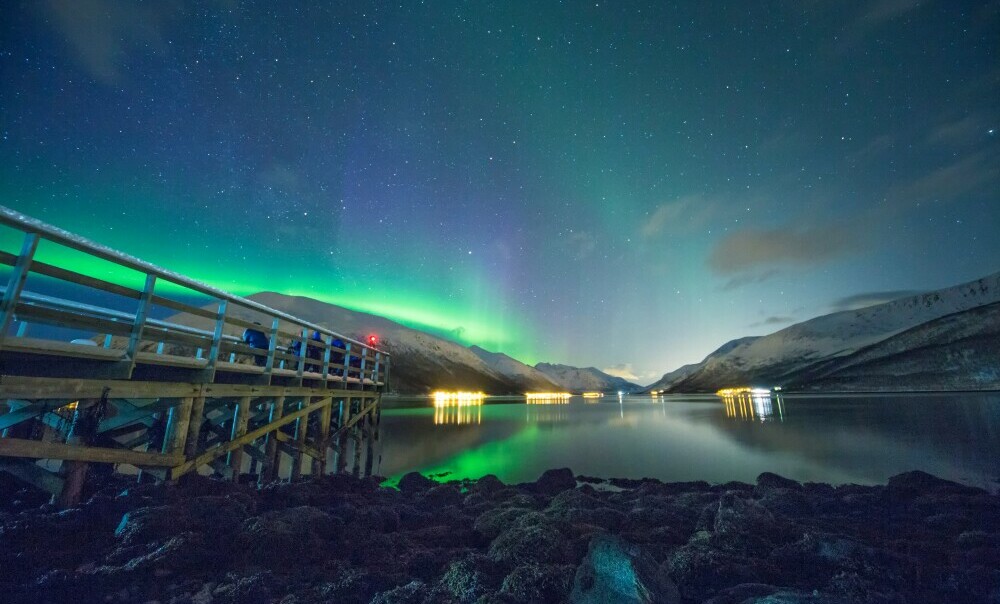
 Paweł Wielądek (2022) The Northern Lights Norway [Photograph] Unsplash
If you’ve ever gazed at images of the Northern Lights, you’ve probably experienced the allure of their enchanting display. But what exactly are you witnessing in those photographs? The Northern Lights, or Aurora Borealis, is a celestial ballet of light dancing across the night sky caused by charged particles from the sun colliding with Earth’s atmosphere.
The pursuit of photographing this natural wonder isn’t as simple as pointing a camera upwards. It demands a blend of proper timing, location, and technical know-how. Typically, the prime season for Aurora viewing and photography stretches from late autumn to early spring, when nights are long and dark.
As you set out on your night-time photography adventure, it’s crucial to understand that the intensity and clarity of the Aurora can vary significantly. Chasing the Northern Lights requires patience and a bit of luck, with factors like solar activity and local weather conditions playing a pivotal role.
What often gets overlooked is that the ambient light conditions are far from ordinary during these magical displays. This brings us to a photographer’s well-kept secret—filters. In the next section, I’ll cover filters‘ significant role in transforming your Northern Lights photography from good to great.
The Crucial Role of Filters in Northern Lights Photography
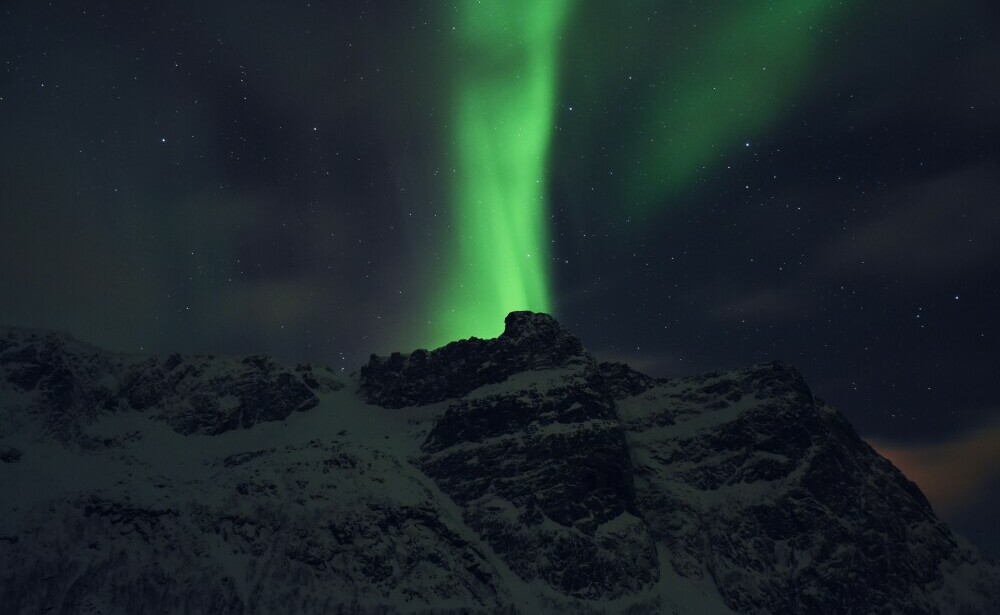
 Lightscape (2018) The Northern Lights Norway [Photograph] Unsplash
Integrating filters into your gear is a game changer if you’re pursuing the elusive beauty of the Northern Lights. Let me explain why they’re more than just accessories. Filters serve as modifiers that control light entering your lens, giving you control over the final image before you press the shutter.
Regarding Aurora photography, the right filter can mean the difference between a washed-out sky and a vibrant display of colors. A polarizing filter, for example, can enhance the clarity of the Northern Lights by reducing glare and reflections. This can intensify the colors, and the stars stand out sharply against the night sky.
Neutral-density (ND) filters are equally important. Think of an ND filter as sunglasses for your camera. They reduce the light reaching the sensor, allowing longer exposure times without overexposing the image. This can be particularly useful if you’re shooting the Northern Lights with a bright moon in the sky.
Graduated ND filters take this further by offering a gradient effect—more filtration on one end than the other. This helps balance the exposure between the bright horizon during early auroral displays and the darker sky above.
Lastly, UV filters offer lens protection from the elements without affecting your long exposures much—a bonus when shooting in the cold, unpredictable climate where the Northern lights are found. But beware: Low-quality UV filters can introduce unwanted flares and reduce the overall sharpness of your image, so choose wisely.
Understanding the mechanics behind these filters is just one part of the equation. Knowing HOW to use them effectively is where your photography turns magical. Stick with me, and I’ll guide you through the practical applications of these tools in the field for some truly stunning results.
Mastering Filter Techniques: Tips & Tricks
 Adithya Holehonnur (2016) The Northern Lights Norway [Photograph] Unsplash
Grappling with camera settings at night can be confusing, but filters can elevate your Northern Lights photography with the right approach.
Balancing the trinity of ISO, aperture, and shutter speed is pivotal. Start by setting your ISO between 800 and 3200, your aperture to the lowest number, say f/2.8 or f/4, and your shutter speed to around 15-30 seconds. I use filters to refine these settings further.
Neutral Density (ND) filters are a game-changer. They allow you to control shutter speed for longer exposures, giving the Northern Lights that signature, silky smooth aesthetic. Imagine capturing the dance of colors with a crisp foreground; it’s possible and within reach with an ND filter.
Remember, photography is about the dance between light and shutter. Using a more robust ND filter, compensate with a higher ISO or a wider aperture. The goal is to capture the faintest colors without losing details to overexposure.
No hefty manual is required—adjusting filters is all about trial and error. Take a test shot, review, change, and repeat. And don’t forget to protect those filters from frost! A lens heater or hand warmer can keep your gear from fogging or freezing.
The real scene-stealer is manipulating light in real-time. Filters are powerful, but they require a deft touch. So, stay patient, find your rhythm with the settings, brush up on the night’s forecast, and you’ll be set to capture those ethereal northern skies.
Post-Processing Mastery: Enhancing Your Northern Lights Imagery
 Bit Cloud (2019) The Northern Lights Norway [Photograph] Unsplash
When the shoot is over, the art of Northern Lights photography isn’t quite complete. Post-processing is the final, critical step to bringing out the best in your images. While filters do a great deal of heavy lifting in the field, software editing helps refine and elevate your work.
In-camera filter effects set a strong foundation, but they have their limits. Software programs like Adobe Lightroom or Photoshop open a realm of possibilities, allowing you to fine-tune colors, sharpen details, and correct any exposure issues that weren’t fully controlled during the shoot.
I’ll walk you through some non-destructive editing practices that respect the scene’s integrity. You’ll learn how to adjust the white balance to accurately reflect Aurora’s colors, enhance the stars’ crispness without adding digital noise, and bring out foreground details that may have been lost in the shadows.
Above all, it’s important to remember the ethics of nature photography. While it’s tempting to push the limits of saturation and contrast to create a more ‘dramatic’ effect, staying true to the natural beauty of the Aurora preserves its awe-inspiring authenticity. Striking the right balance between enhancement and reality is the hallmark of a responsible and respected Northern Lights photographer.
For additional blog posts, please visit:
Northern Lights Shutter Tech – Capture the Magic Gear & Expertise
(This post may contain affiliate links. If you make a purchase, I may receive a small commission at no cost to you. Thank you!)