 Jonatan Pie. (2018) The Northern Lights Iceland [Photograph]. Unsplash.
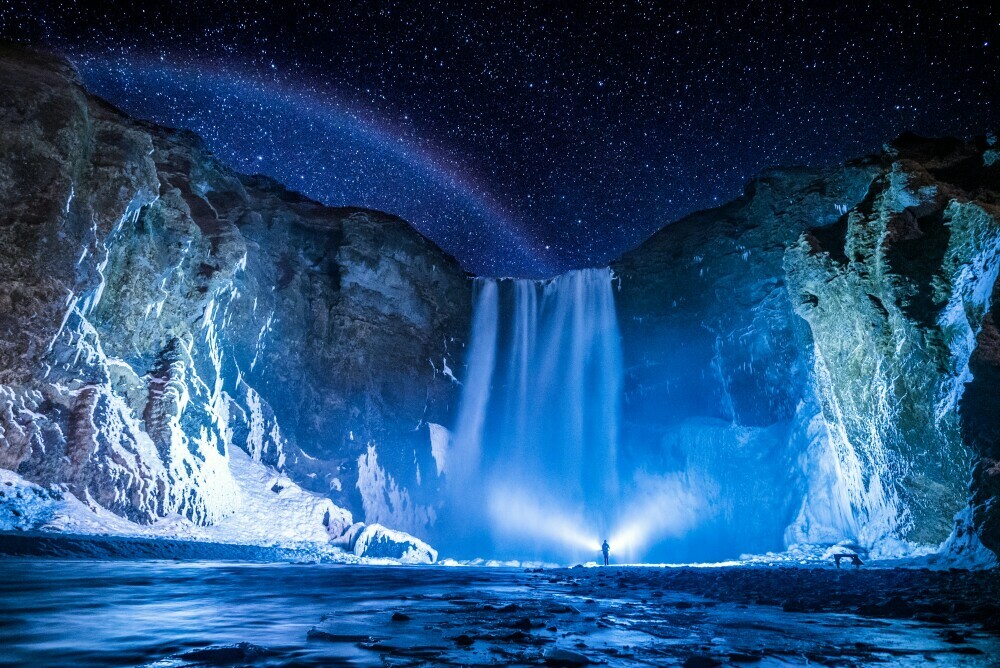
Capturing the Northern Lights, or Aurora Borealis, can be as elusive as the phenomenon. Whether you’re a seasoned photographer or a beginner, you’ve probably faced the challenge of conveying the true spectacle through your lens. The solution? High-dynamic-range (HDR) editing is a technique that can transform your Northern Lights photography into a canvas of vivid colors and breathtaking contrasts.
HDR editing combines multiple exposures of the same scene to create a single image with a broader luminance range. This is especially useful in Northern Lights photography, where the dynamic range between the darkest night skies and the luminous Aurora can be vast.
By incorporating HDR editing, you ensure the most captivating aspects of the Aurora Borealis are never lost. Shadows reveal hidden details, while highlights maintain their ethereal quality, all within one image. It’s a powerful technique to convey the full glory of this natural wonder in your photography.
Mastering HDR Photography Techniques for Aurora Borealis
 Jonatan Pie. (2017) The Northern Lights Iceland [Photograph]. Unsplash.
Capturing the Northern Lights requires patience, skill, and the right gear. Start with a sturdy tripod and a camera capable of manual settings. You’ll need to take multiple exposures of the same scene for HDR, varying only the shutter speed.
Your lens choice matters. Go for wide-angle lenses to capture the expansive sky. Set your camera to a low ISO to reduce noise, and use a remote shutter release or your camera’s timer to avoid camera shaking. You’ll be taking several shots, so consistency is crucial.
Now, for the HDR sequence: Begin with a ‘normal’ exposure based on your camera’s light meter. Then, bracket your shots, adjusting the shutter speed to capture underexposed and overexposed images. This range will give you the highlights and shadows you need for HDR.
Be aware of how the aurora behaves. Rapid movement means shorter exposures to prevent blurring. Still, more prolonged exposure might be necessary if the lights are faint. It’s all about finding that sweet spot where the aurora’s dance is beautifully recorded.
After your successful shoot, it is vital to protect your data and back up your images before moving on to post-processing. This is the next step in transforming these raw captures into striking HDR Northern Lights photographs.
The Post-Processing Phase: Enhancing Your Northern Lights Images
 Alessandro Viaro. (2016) The Northern Lights Italy [Photograph]. Unsplash.
Once you have your collection of Northern Lights shots, the real magic begins in the post-processing phase. This is where HDR editing becomes vital to extracting all the drama and beauty from each frame. Think of it as developing the hidden stories within your photographs, those subtle dances of light that the naked eye could easily miss.
HDR editing isn’t just a click-and-apply fix. It’s an art that requires patience and finesse. It’s where your creativity fuses with technology to elevate your aurora photography from good to spectacular. The right software is critical. Options like Adobe Lightroom and Photoshop are industry standards that can easily handle the complex layers of HDR editing.
Your primary goal in the HDR post-processing phase is to balance the three cornerstone elements: shadows, mid-tones, and highlights. Aim for a seamless blend that captures the essence of the aurora’s dynamic range without sacrificing the natural look. Overcooked HDR can look unnatural and is often the telltale sign of amateur work. Restraint is your friend here.
Take the time to adjust colors with a critical eye. The Aurora Borealis is renowned for its vibrant greens and purples; you want them to shine without overwhelming the viewer. Use selective color adjustments to enhance the right segments, boosting vibrancy where needed while keeping a natural balance.
The advanced techniques you’ll need include tone mapping, exposure blending, and working with luminosity masks. These methods allow you to handle each exposure separately and combine the best aspects of light and shadow. With tone mapping, you can create a cohesive image highlighting textures and details often lost in single exposures.
Remember that details matter. Finer adjustments like sharpening the image ensure that textures pop. However, be wary of amplifying noise, a common side effect of HDR. Noise reduction tools are critical, especially when dealing with high ISO shots typical of night photography. Dialing this in will ensure clarity without softening your photo too much.
Finally, exporting your dynamic Aurora photographs is more than hitting ‘save.’ You must consider the format that best preserves your hard work. File formats like TIFF or PNG can retain the high quality of your HDR images, but if you’re sharing them online, a well-processed JPEG can also suffice, provided you export them in the highest quality settings.
Making the Final Adjustments: Perfecting Your HDR Northern Lights Images
 Benjamin Voros. (2018) The Northern Lights Italy [Photograph]. Unsplash.
After you’ve applied advanced editing techniques to your Aurora Borealis photographs, it’s crucial not to rush the finishing touches. These steps are essential in ensuring that the vibrancy and clarity of your images match your artistic vision.
Consider the overall composition once more. Sometimes, what seemed insignificant during the editing process might now stand out. Crop or clone out any distractions that pull focus from the stunning natural phenomenon.
FINE-TUNE SHARPNESS AND REDUCE NOISE: The balance between sharpness and noise is delicate. Over-sharpened images can accentuate noise, while too much noise reduction can lead to a loss of detail. Adjust these settings cautiously to maintain the natural beauty of the night sky.
READY FOR PRINT OR WEB: Decide where your final HDR images will be displayed. Printing output settings differ from those you would use for displaying images online. Ensure the resolution and file format match the intended use to preserve the total quality of your work.
By now, you understand that patience and attention to detail are as crucial in HDR editing as they are during the shoot. Take pride in the beautiful Northern Lights imagery you’ve crafted, knowing that the moments you’ve encapsulated with HDR techniques can ignite wonder in anyone who views them.
Disclaimer: The Aurora Borealis is a natural phenomenon, and sightings cannot be guaranteed.
This article directly provides general research and book tours with reputable operators for the most up-to-date information and the best possible experience.
For additional blog posts, please visit:
https://northernlightsshuttertech.com/
(This post may contain affiliate links. If you make a purchase, I may receive a small commission at no cost. Thank you!)